Creating your lists is a fundamental step in getting started using your account. To create your list, click on the Contacts option from the left sidebar, select the Lists tab from the top, and click on the Create List button:

You will be asked to insert the list details:
- List Name: add a name to your list.
- List Description: add a brief description of your list.
- Include in Contact Preferences Page: when this option is turned on, it will add this list to the preference page where the contacts can manage how you communicate with them including unsubscribing or subscribing back to this list.
- Sender Details: these fields will be prefilled by your default sending values specified in your Settings and you will have the option to modify them when sending an email campaign.
When you have completed all details click on Create.

After you create your list, you can edit your list settings from the Drop-down menu next to the list, go to Form Settings.

On this page, you can choose to turn on the subscription settings you want:
- Allow multiple submissions from the same contact: to allow the same contact to subscribe multiple times using the same email.
- Email Confirmation required: to turn on the double opt-in for your contacts.
- Turn on Autoresponder: to send emails to your contacts once they subscribed to the list. (Please note that you can always use Automation to send Autoresponder email).
- Notify admins of new contacts: to be notified of new sign ups (you can add multiple emails to be notified).
- Redirect after subscription: to redirect the contact after submission to a new page, such as a thank you page on your website or a landing page on your account.
Please note that in case you have turned on the Email confirmation required (double opt-in) option, you will have the option to hide the “Subscribe Again” button and to set a redirect after confirmation URL.

Also, you have the option to edit the content of the email your contacts receive when they sign up to your new list and the email received by the admin once a contact is added.
For example, you can choose the Subject line, edit your From, Reply-to and Name fields, and create the body of the email they receive. You can also edit the Success/Failure message they see right after they submit the form.
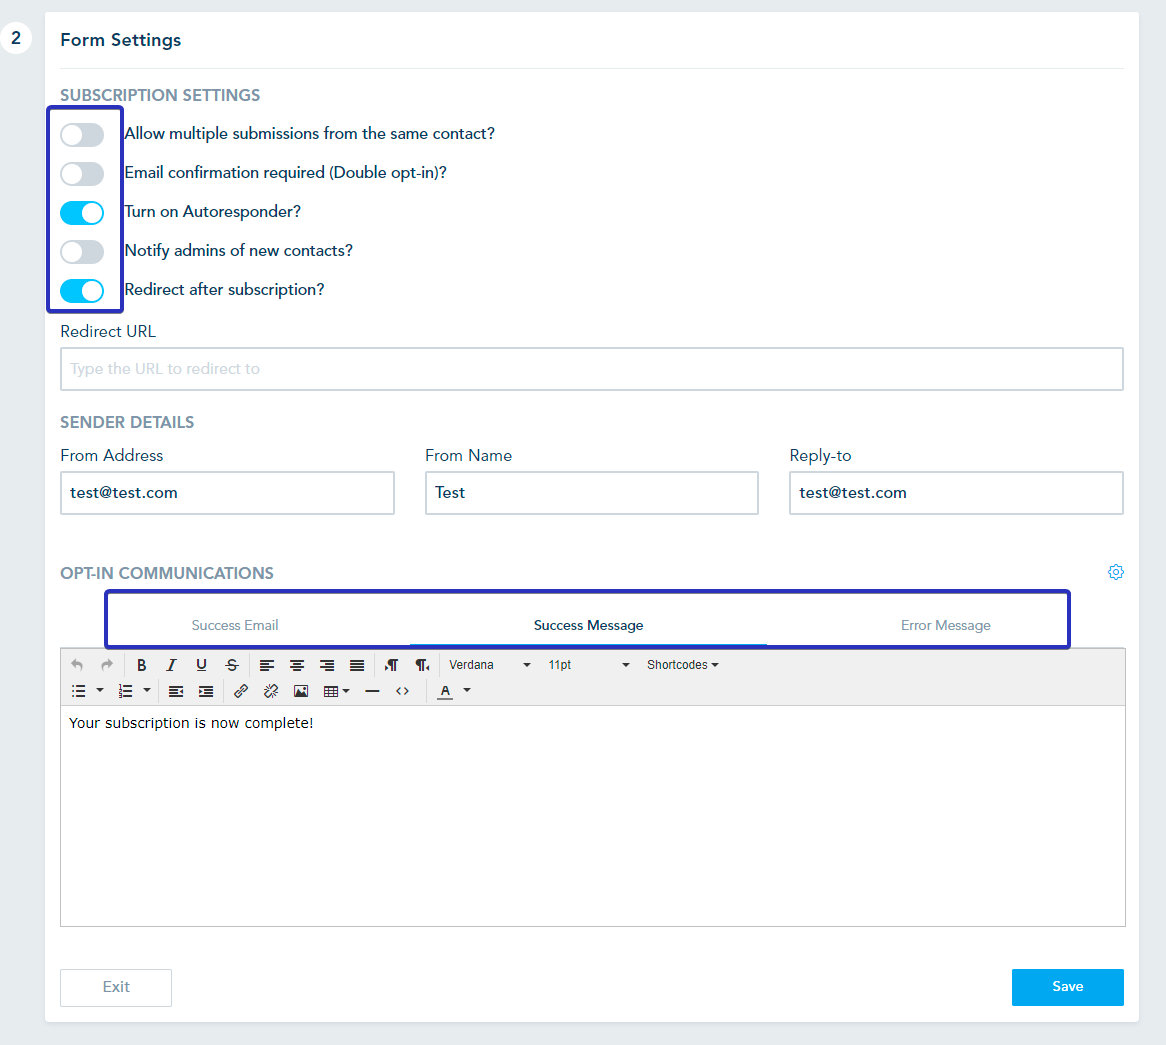
Once done, click the Save button in the bottom right to save your changes.
Please note that you can also edit the fields of your list by going to Fields & Form option next to your list. For more details, please check this article.
Was this article helpful?
That’s Great!
Thank you for your feedback
Sorry! We couldn't be helpful
Thank you for your feedback
Feedback sent
We appreciate your effort and will try to fix the article